GUIDE Q-Link knobs
Q-Link knobs on the MPC: the complete guide
Every modern standalone MPC ships with a row of touch-sensitive knobs above the pads, and most people learn what one knob happens to be doing right now without ever learning the system underneath it. Q-Link knobs are hands-on control for whatever is on screen or in your project, sample start and end points, Timing Correct swing, mixer levels, pad parameters, macros mapped across modes, even an Envelope Follower and LFO on newer OS builds with the Pro Pack. This is the whole system: what a Q-Link knob actually does, how the four-bank layout works on most hardware and how the MPC X/X SE does it differently with a small OLED strip above each knob, the Q-Link Status pop-up, Q-Link Edit mode, and every practical use worth memorizing, checked page by page against Akai's own manual.
The short version
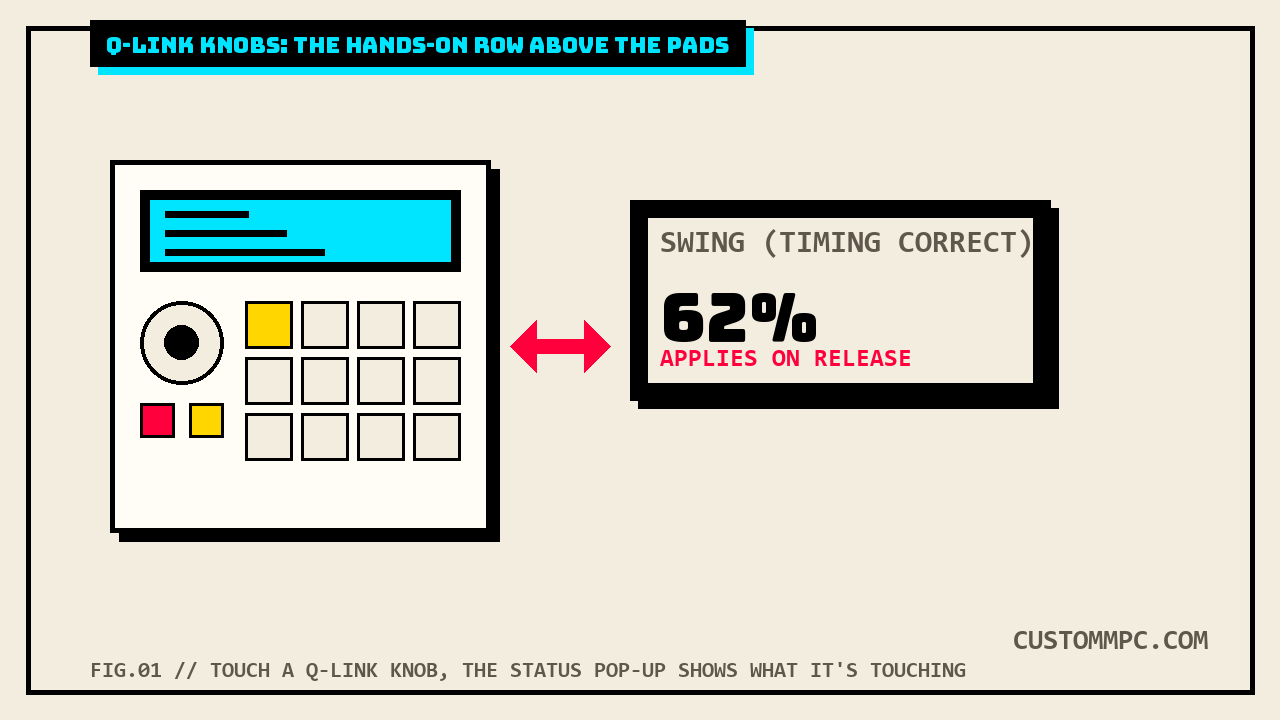
Q-Link knob controls let you quickly manipulate various parameters on screen or in your project without digging through menus. Every current standalone MPC except the X and X SE splits its knobs into four banks, cycled with the Q-Link button, and shows which bank is active with a small light strip above the knobs. The MPC X and X SE work differently: the current Q-Link control parameters are shown directly on OLED display strips above each knob, so there's less banking and more reading straight off the hardware. Press and hold the Q-Link button on any hardware and a Q-Link window pops up over whatever's on screen, letting you switch modes and see every current assignment at a glance, and if you're new to the system, Akai's own manual recommends turning on Q-Link Status so a pop-up shows you the parameter and value the instant you touch a knob. That's the whole system in outline. What actually fills those banks changes by mode: sample edit puts start and end trim under your fingers, the Sequencer preferences page hangs Timing Correct swing off a knob, and Q-Link Edit mode lets you build your own macros across up to 16 knobs, pulling in track, pad, insert, return, submix, or main output parameters at once.
WORKING PRODUCER'S NOTE: the knobs are the fastest hands-on control on the whole machine, and also the easiest to leave on autopilot. Most people learn three or four Q-Link tricks by accident, trimming a sample, maybe swing, and never touch the rest. Q-Link Edit is where this stops being a party trick and starts being a real performance surface, one knob mapped to your kick's decay and your snare's pan at the same time, recallable per project. Learn the bank system once and every mode on the machine gets a little faster.
What a Q-Link knob actually is
Physically, Q-Link knobs are touch-sensitive rotary controls positioned above the pad grid on every current standalone MPC, One, One+, One G2, Live II, Key 61, Key 37, Key 37 G2, X, and X SE. On the MPC X, the hardware reference calls them out directly: turn these touch-sensitive knobs to adjust various parameters and settings, and the display strip above each knob indicates the parameter it's controlling. On the MPC One and MPC One+, the equivalent entry describes the same knobs a little differently: they control one column of parameters at a time, with lights above the knobs indicating the currently selected column, and pressing the Q-Link button changes which column they control. Every knob is touch-capacitive as well as rotary. Touching one, not turning it, is what triggers the Q-Link Status pop-up if that setting's enabled, which means you can check what a bank is currently mapped to without accidentally moving a value.
The four-bank system, and the word Akai's own manual can't settle on
Worth flagging up front rather than picking one term and pretending the manual is consistent: Akai's own Standalone OS User Guide uses "bank" and "column" interchangeably for the exact same four-way grouping of Q-Link knobs, sometimes within a few pages of each other. The basics chapter and the general Preferences pages call them banks. The hardware reference pages for the MPC One, One+, and One G2 call the same grouping columns, in the same breath as describing the same physical button that cycles them. Preferences settings split the same way. Shift plus Q-Link Press determines whether that combination opens Q-Link Edit or cycles backward between the Q-Link columns, and in Sample Edit Mode's Trim tab, Akai instructs you to use the first column of Q-Link knobs for the sample start point and the second column for the end point, both "column." But in Track Edit Mode's Samples/Oscs tab, adjusting the exact same start and end points on the exact same hardware knobs is described with "bank" instead: for MPC hardware with four Q-Links, the first bank adjusts the start point and the second bank adjusts the end point. Same hardware, same grouping of four, same underlying feature, two different nouns depending on which chapter you're reading. It doesn't change how anything works, the knobs still group in fours and the Q-Link button still cycles between groups, but if you search Akai's own manual for one term and come up short, try the other before assuming the feature isn't documented.
| Section | Term used | What it's describing |
|---|---|---|
| Basics chapter, p.28 | Bank | The four-way grouping cycled by the Q-Link button on non-X hardware |
| Preferences > Shift + Q-Link Press, p.65 | Column | The same four-way grouping, cycled backward |
| MPC One / One+ hardware reference, p.359 | Column | The physical knobs and the light strip above them |
| Sample Edit Mode > Trim, p.36 | Column | Start point on the first group, end point on the second |
| Track Edit Mode > Samples/Oscs, p.197 | Bank | Start point on the first group, end point on the second, same feature as above |
The Q-Link Status pop-up
The Q-Link Status pop-up is the fastest way to confirm what a bank is currently doing before you turn anything. When enabled, touching a Q-Link knob opens a pop-up on the right side of the screen showing the current Q-Link assignments and values, and it clears itself once you stop touching the knob. It's a Preferences > General toggle, and it's also reachable straight from the Q-Link window itself: press and hold the Q-Link button to open that window, and tap the Q-Link Status button inside it to enable or disable the same pop-up without leaving whatever mode you're in. There's a related, separate toggle worth knowing about if you automate with the knobs: Automation Lane Follows Q-Links, which, when enabled, automatically shows the current automation status in Grid View's automation lane the instant you touch a Q-Link, useful for confirming you're about to write automation onto the parameter you think you are before you actually touch it. Akai's own manual specifically recommends leaving Q-Link Status on for anyone still learning the system, and there's no real downside to leaving it on permanently, it only appears when you touch a knob, and it disappears the moment you let go.
Q-Link Edit mode: Q-Links, XY Pad, Crossfader
Q-Link Edit mode is where you build your own macros instead of relying on whatever a given screen puts under the knobs by default. Macros let a single Q-Link knob control multiple automation parameters across different modes at once, useful for expressive, single-gesture performance moves, and the same mode also lets you map automation parameters onto the XY Pad interface. Enter it by pressing Menu and tapping Q-Link Edit, or by pressing and holding the Q-Link button (any Q-Link Mode button on MPC X/X SE) to open the Q-Link window, then tapping Q-Link Edit at the bottom of the screen. Three tabs sit at the bottom by default, Q-Links, XY Pad, and Crossfader, and a fourth, Envelope Follower / LFO, only lights up with the MPC Pro Pack activated. Inside the Q-Links tab specifically, a Mode field picks which of ten total behaviors the current bank of knobs uses, Screen, Project 1 and Project 2, Track, Pad Scene, Pad Parameter, Track FX Rack, MIDI, Volume, Pan, or Send 1 through 4, and everything except Screen, MIDI, Volume, Pan, and Send is a genuine macro mode you can populate yourself with any combination of track, pad, keygroup, insert, return, submix, or main output parameters. At any point, in any mode on the machine, holding the Q-Link button (or any Q-Link Mode button on MPC X/X SE) brings up the same Q-Links window on top of whatever's on screen, letting you jump straight to a different mode without formally entering Q-Link Edit.
Practical use: sample start and end trim
Trimming a sample by ear instead of typing numbers is one of the most immediate reasons to reach for a Q-Link knob, and Akai documents it in two different modes with two different terms for the exact same four-knob grouping (see the bank/column note above). In Sample Edit Mode's Trim tab, the first column of Q-Link knobs adjusts the sample's start point with varying degrees of resolution when in Screen Q-Link Edit Mode, and the second column adjusts the end point the same way, both with tap-and-drag and numeric-keypad alternatives available too. Track Edit Mode's Samples/Oscs tab documents the identical behavior for a track's start and end markers, this time in "bank" language: when the Q-Links are set to screen mode, the first bank adjusts the start point and the second bank adjusts the end point, in fine and coarse adjustments. The same Samples/Oscs tab hides one more knob assignment worth knowing: the bottom-most Q-Link knob in the fourth bank zooms the sample waveform display in and out, which beats swiping through a long sample looking for the exact transient you want to trim to.
Practical use: Timing Correct swing
Two Sequencer preference settings connect a Q-Link knob directly to swing, and they're easy to miss because neither lives inside the Timing Correct window itself. Q-Link Swing Control Applies TC Settings on Release: when enabled, turning the Q-Link knob assigned to Swing and then releasing it immediately applies that Swing setting, no trip to the Timing Correct window required. When disabled, you have to open Timing Correct and apply the Swing setting there instead. The other, Q-Link Playhead Increment, determines how the playhead moves when it's controlled by a Q-Link knob: set it to 1/16 Note to lock playhead movement to sixteenth notes, or to TC Division to tie playhead movement to whatever division Timing Correct is currently set to, adjustable from the clock icon at the bottom-left of the Grid View grid. For the full breakdown of what Swing actually does to a groove, our own Swing and Quantize guide covers the Timing Correct window itself in depth. This section is specifically about the Q-Link shortcut into that same setting, not the setting's musical behavior.
Practical use: mixer, pad, and macro parameters
Volume, Pan, and Send 1 through 4 are dedicated Q-Link Edit modes in their own right, not macros you have to build: in Volume mode the Q-Links are fixed to controlling the volume level of the available tracks, in Pan mode they're fixed to stereo panning, and Send 1 through 4 modes each fix the knobs to that one Send control across the available tracks. Two pad-specific modes work differently from each other in a way that's easy to mix up. Pad Scene assigns the 16 knobs to 16 different parameters on whichever single pad is currently selected, and pressing a different pad swaps the whole scene to that pad's own set of assignments, saved automatically with your other user settings. Pad Parameter flips that around: it locks all 16 knobs to one single parameter, say Level, applied across all 16 pads in the current bank simultaneously, so you can balance every pad's level (or switch the Parameter field to Pan and balance every pad's stereo position) without selecting pads one at a time. Track mode is the general-purpose macro slot for whatever's currently selected: 16 track parameters, plus anything on that track's pads, keygroups, or inserts, though notably not Return, Submix, or Main Output parameters, which belong to Project 1 and Project 2 mode instead. Track FX Rack is narrower still, 16 FX Rack parameters scoped to the currently selected track's own Insert effects, and those assignments can be saved as part of an FX Rack preset rather than living only in the current project. For the fields inside the Channel Mixer and Pad Mixer themselves, our Channel Mixer vs. Pad Mixer guide covers every tab in both mixers; this section is specifically about the Q-Link shortcut modes that reach the same volume, pan, and send values from the hardware.
| Mode | What it controls |
|---|---|
| Screen | Fixed to a parameter or group of parameters in the currently selected mode (Pad Mixer, Sample Edit, etc.) |
| Project 1 and Project 2 | 16 knobs, any parameter in the project, including Return, Submix, and Main Output |
| Track | 16 knobs, current track plus its pads, keygroups, and inserts, not Return/Submix/Main |
| Pad Scene | 16 knobs, 16 parameters on the currently selected pad; changes per pad, saved automatically |
| Pad Parameter | 16 knobs, one parameter across all 16 pads in the current bank |
| Track FX Rack | 16 knobs, current track's own Insert effect parameters; savable in an FX Rack preset |
| MIDI | Fixed to modulation, pitch bend, sustain, and other common MIDI performance messages |
| Volume / Pan | Fixed to track volume or stereo panning across available tracks |
| Send 1 through 4 | Fixed to one Send control across available tracks |
Practical use: Envelope Follower / LFO (Pro Pack)
The fourth Q-Link Edit tab, Envelope Follower / LFO, only appears with the MPC Pro Pack activated, and it turns a Q-Link assignment into a modulation source instead of a direct control. It lets you use an audio signal, a kick drum is Akai's own example, as a control signal to create side-chain or modulation effects, with 16 available envelope followers selectable from the Control field. The Envelope Source field picks what feeds the envelope, audio from a track, a specific pad on a Drum track, a Keygroup, a Return, a Submix, the Main Output, or one of several dedicated LFO shapes if you'd rather modulate on a fixed cycle than follow a live signal. From there you choose where in the signal chain the envelope taps in, Input (MIDI/CV tracks only), Pre-Inserts, Post-Fader, or Playback (also MIDI/CV only), then shape it with Gain, Delay, Gate, Hyst, Attack, and Decay knobs, several of which double as draggable handles directly on the envelope display. This whole tab is gated behind the Pro Pack, and it's the deepest Q-Link Edit mode on the machine by a wide margin, worth knowing exists even if you never touch it, because it's easy to assume Q-Link Edit tops out at simple macros when it actually reaches into full side-chain territory.
The real hardware split: MPC X/X SE vs. everything else
Both manuals on file agree this is a genuine hardware difference, not a software preference: the MPC X and X SE physically display Q-Link parameters on small OLED strips built into the hardware above each knob, while every other current standalone MPC (One, One+, One G2, Live II, Key 61, Key 37, Key 37 G2) relies on a light strip that only indicates which bank is active, not what each individual knob is doing, since the knobs themselves carry no display. That display difference carries a real workflow consequence, not just a cosmetic one: the MPC X and X SE don't rely on a single Q-Link button cycling through four banks at all. Instead they use several dedicated hardware Q-Link Mode buttons, named Project, Program, Pad Scene, Pad Param, and Screen Control, and pressing and holding any one of them opens the same Q-Links overview window that a single Q-Link button opens on every other model. In practice: on an MPC X or X SE you generally pick a Q-Link Mode button that matches the parameter group you want, and the OLED strips confirm what landed on each knob. On a One, Live II, or Key, you press the single Q-Link button to step through banks one at a time and either watch the light strip or touch a knob to trigger the Q-Link Status pop-up to confirm what you're on. Same underlying feature set, meaningfully different physical workflow, and it's a real spec difference worth knowing before buying into either hardware family expecting the other one's muscle memory to transfer directly.
Common mistakes and quick fixes
Mistake: turning a Q-Link knob without knowing what it's mapped to. Touch it first instead of turning it. With Show Q-Link Status When Touched enabled, a pop-up shows the current assignment and value the instant you touch the knob, before you've moved anything.
Mistake: expecting Swing changes from a Q-Link knob to apply instantly. That behavior is a separate Preferences toggle, Q-Link Swing Control Applies TC Settings on Release, and it's off by default logic aside, if it's disabled you still have to open the Timing Correct window and apply the setting there.
Mistake: searching the manual for "Q-Link bank" and finding nothing in a section that clearly documents banks. Try "column" instead, or vice versa. Akai's own manual uses both words for the identical four-knob grouping depending on which chapter you're in.
Mistake: building a macro in Track mode and expecting it to reach a Return or Submix. Track mode is explicitly scoped to the current track plus its pads, keygroups, and inserts. Return, Submix, and Main Output parameters live in Project 1 and Project 2 mode instead.
Mistake: assuming Envelope Follower / LFO is a standard Q-Link Edit tab. It's Pro Pack only, and the tab stays visibly greyed out until Pro Pack is activated on that unit.
A note on sources
Every technical claim above is checked directly against Akai's Standalone OS User Guide, primarily Manual Version 3.9: the basics-chapter Q-Links overview on page 28, Sample Edit Mode's Trim tab on page 36, the Preferences fields spanning pages 65 through 68, Track Edit Mode's Samples/Oscs tab on pages 196 and 197, Q-Link Edit mode and its Q-Links tab on pages 306, 313, 314, and 315, the Q-Link Knobs MIDI-mapping fields on page 336, the Pad & Q-Link Controls hardware reference entries on pages 345 (MPC X), 359 (MPC One/One+), 363 (MPC One G2), and 378 (MPC Key 37 G2), and the Pro Pack Envelope Follower / LFO chapter on page 508. No retailer page, forum thread, or review was used for any spec or step.
We also checked every one of those page numbers against Manual Version 3.7 to confirm the underlying content matches, since 3.7's table of contents lists the same sections at different page numbers, page 24 for the basics-chapter Q-Links overview instead of 28, page 296 for Q-Link Edit instead of 306, page 478 for Envelope Follower / LFO instead of 508. That's a real, disclosable finding rather than a typo to silently correct: the gap between the two versions isn't a flat offset. It's plus 4 pages by the time you reach the basics-chapter overview, plus 10 pages by the main Q-Link Edit chapter, and plus 30 pages by the Pro Pack addenda, which lines up exactly with the two files' total page counts, 529 pages in version 3.9 against 499 in version 3.7. We pulled both page-28-versus-24 passages and both page-508-versus-478 passages directly and confirmed the text is word-for-word identical between versions; the only thing that moved is where those identical passages land, because version 3.9 added roughly six pages of new content somewhere between the basics chapter and the main Operation chapter, and another twenty pages somewhere before the addenda, relative to version 3.7. We did not go hunting for exactly what filled those added pages, that's outside this article's scope, but the page-number drift itself is real and worth knowing if you're ever cross-referencing a page number from an older printout or forum post against a newer manual download.
Verdict: the fastest way to stop guessing what a knob does
VERDICT
New to Q-Link knobs entirely: turn on Show Q-Link Status When Touched in Preferences > General first, then touch (don't turn) a few knobs across a few different modes and read the pop-up. That single habit removes most of the guessing. Trimming samples: Sample Edit Mode's Trim tab puts start on the first bank and end on the second, and Track Edit Mode's Samples/Oscs tab does the same with a bonus waveform-zoom knob in the fourth bank. Chasing a specific groove feel: enable Q-Link Swing Control Applies TC Settings on Release so a Swing knob commits the instant you let go, instead of routing through the Timing Correct window every time. Building a real performance macro: Q-Link Edit's Track, Pad Scene, Pad Parameter, and Project 1 and Project 2 modes cover almost everything on the machine between them, and Track FX Rack macros travel with a saved FX Rack preset. Own the Pro Pack: the Envelope Follower / LFO tab turns one Q-Link assignment into a full side-chain or modulation source, sixteen of them available at once, easy to forget exists if you never open that fourth tab.
Found a Q-Link macro combo worth sharing? Tell us what happened.