GUIDE MIDI CC
MIDI CC automation and mapping on the MPC
Every parameter that moves on an MPC, a filter opening, a send rising, a plugin knob sweeping, can be driven by a MIDI Control Change message, recorded as automation, filtered per track, or mapped from an external knob, strip, or pedal. Most people touch one corner of this system by accident, a Q-Link knob that happens to send CC1, and never learn the rest. This is the whole loop: what actually counts as MIDI CC automation versus the other automation types on the same event list, how to record and clear it in a sequence, the per-track filter that decides which incoming CC numbers a track even listens to, how to point a Q-Link knob, the Touch Strip, or a sustain/expression pedal at a specific CC number so it reaches an MPC or plugin parameter, and two real, disclosed differences between the two manual versions we checked this against.
The short version
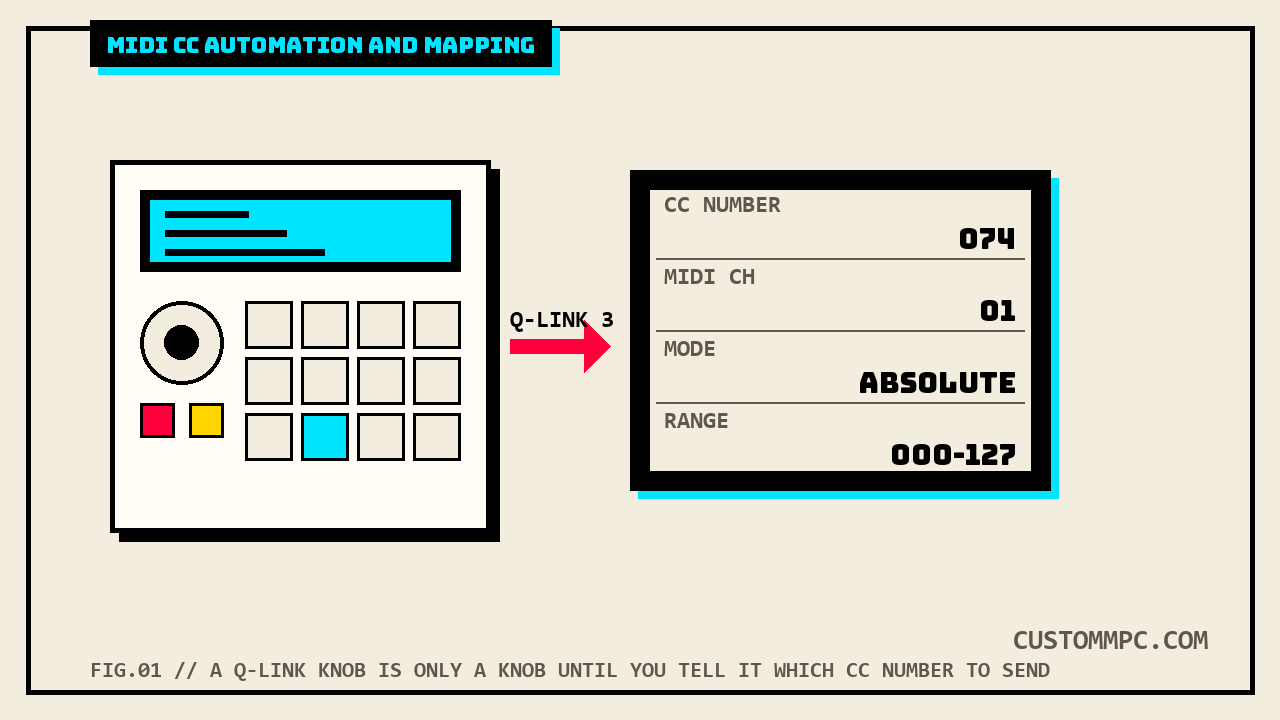
MIDI CC automation is its own event type on the MPC, separate from note events, mixer automation, and the aftertouch/pitchbend/program change parameters that live under a different icon on the same list. To record it, arm SEQ REC ARM at the bottom of Main Mode and press OVERDUB before you play, then set the automation state back to Read once you're done so you can hear it play back instead of overwrite. A per-track MIDI CC Filter decides which incoming CC numbers a track actually listens to, checked boxes pass, unchecked boxes get ignored outright. And every Q-Link knob and the Touch Strip can be assigned its own MIDI channel, CC number, Absolute or Relative mode, and value range, the exact mechanism that turns a physical knob into a specific message your plugin or an external synth is listening for. That's the whole loop. Record it, filter it, map it. The rest of this guide is what each of those three actually does and where people trip on them.
SOUND-DESIGN NOTE: automation is what separates a static patch from a sound that does something. A filter sweep drawn by hand in Grid View is fine, but a filter sweep you performed live with a Q-Link knob mapped to CC74, recorded with OVERDUB armed, is faster to get right and it keeps the human timing. If you build kits or racks for other people to load, this is also the layer that decides whether your patch feels alive the second someone drops it on a pad or whether it just sits there until they go dig through a menu. Map the knob before you write a single note.
What counts as MIDI CC automation
The Grid View, List Edit, and Step Sequencer event lists on the MPC use a set of icons to tell automation types apart at a glance, and MIDI CC Automation, values 0 through 127, is one specific category among several that look similar but are not interchangeable. The full list, in the order Akai documents it: Note, MIDI Automation (Volume, Pan, Mute, Solo), MIDI CC Automation (0-127), MIDI Parameter Automation (Aftertouch, Pitchbend, Channel Pressure, or Program Change), Mixer Automation (Volume, Pan, Mute, Solo, or Send 1-4), Mixer Parameter Automation, Track Insert Effect Automation, Pad/Keygroup Mixer Automation, Pad/Keygroup Parameter Automation, Pad/Keygroup Insert Effect Automation, and Sequence Tempo Automation. The distinction that trips people up is the second and fourth items on that list. Aftertouch, Pitchbend, Channel Pressure, and Program Change are real MIDI messages that ride alongside Control Change messages on the wire, but Akai's own event list keeps them in a separate MIDI Parameter Automation category from the CC Automation type, even though (as the filter section below shows) the Track MIDI Perform Settings screen later folds those same four message types back into the same checkbox list as MIDI CC numbers, using CC128 through CC131 as internal placeholder numbers for messages that are not, strictly speaking, Control Change at all. Worth knowing going in: "CC" on an MPC screen sometimes means the literal 0-127 Control Change range, and sometimes means "MIDI message this screen groups with CC for convenience." Both usages are accurate to what's on screen, they're just not the same 128-number range.
Recording CC automation into a sequence
Recording MIDI CC automation follows the same automation-recording flow as any other parameter, with one extra step Akai calls out specifically because it's easy to miss. First, set the Global or Track automation state to Write. Second, press Play to start recording, and turn the Q-Link knob, move the XY Pad, or adjust the onscreen control you want captured, but if what you're recording is MIDI CC automation specifically, make sure SEQ REC ARM at the bottom of Main Mode is enabled and press OVERDUB on your MPC hardware to arm recording before you start playing. Third, press Stop when you're finished, and set the automation state back to Read so playback actually plays back the automation instead of continuing to overwrite it. Beyond live recording, the same automation, CC or otherwise, can be added and edited by hand in three places: Grid View, List Edit Mode, and the Step Sequencer, each with its own way of drawing or typing values directly onto the timeline rather than performing them in real time. Clearing automation you don't want is a Sequence Edit function, not an undo. Tap the Sequence Edit pencil icon in Main Mode (or press the Erase button on your hardware), select Automation as the Erase type, pick the specific automation parameter and time range, and tap Do It. You can also just delete individual automation events one at a time in Grid View, List Edit Mode, or the Step Sequencer, useful if the whole take is good and only one wrong movement needs fixing.
The per-track MIDI CC filter
Every track has its own MIDI Filter, reachable by tapping the MIDI Filter button to open the Track MIDI Perform Settings window, and MIDI CC Filter is one field inside it, alongside Note Range and Velocity Range for filtering which notes and velocities get through at all. The MIDI CC Filter itself is a straightforward pass or block: check a box next to a listed CC message and it's allowed through to the track, leave it unchecked and that CC message type gets ignored by the track entirely, not just muted, not applied and then discarded, simply never seen. The specific messages this filter covers, straight from the manual's own list, mix genuine 0-127 CC numbers with the CC128-131 placeholder numbers mentioned above for Pitchbend, Channel Pressure, and other non-CC message types.
| CC / code | Message | CC / code | Message |
|---|---|---|---|
| CC1 | Modulation | CC65 | Portamento On/Off |
| CC2 | Breath | CC66 | Sostenuto On/Off |
| CC3 | Undefined | CC67 | Soft Pedal On/Off |
| CC4 | Foot | CC68 | Legato Switch |
| CC5 | Portamento | CC128 | Pitchbend |
| CC7 | Volume | CC129 | Channel Pressure |
| CC10 | Pan | CC130 | Program Change |
| CC11 | Expression | CC131 | Aftertouch |
| CC64 | Sustain On/Off |
Practically, this filter matters most when a track is receiving from a controller keyboard or DAW that's dumping more CC traffic than the track needs, an expression pedal you're not using on that particular patch, a mod wheel fighting with automation you already drew by hand, or a DAW's own CC7 volume messages colliding with a level you're controlling from the MPC mixer instead. Unchecking the box for a message type you don't want is cleaner than trying to filter it upstream in the controller or DAW.
Mapping a Q-Link knob or Touch Strip to a CC number
Every Q-Link knob and the Touch Strip can be individually assigned a set of MIDI parameters that determine exactly what message it sends, and CC Number is the one that decides which Control Change number lands on your plugin or external gear. The full field set, per knob or per strip: Control (which hardware control you're currently editing, Q-Link 1-16 or Touch Strip), Light LED (a cosmetic setting with no actual function on current hardware), MIDI Channel (1-16, which channel the message goes out on), CC Number (the actual Control Change number sent), Mode (Absolute or Relative, not available for Touch Strip), Low Range and High Range (0-127 each, the value range the control sweeps across), Touch Sense (whether touching, not turning, the control also sends a Note On message), and Note (the specific MIDI note number sent when Touch Sense is on). Mode is the field most worth understanding before you map anything: in Absolute mode the knob's current physical position is its value, which means turning it can make a parameter jump or "snap" the instant you touch it if that parameter was already at a different value from something else, a real risk if you're reusing the same physical knob to control different plugin parameters across different patches. Relative mode sidesteps that entirely, turning the knob increases or decreases the parameter from wherever it already is, regardless of the knob's own physical position. Touch Sense is the other field worth flagging for plugin work specifically: with it on, touching (not turning) the control sends a Note On message in addition to whatever CC behavior it has, which is exactly how Q-Link Status pop-ups and touch-triggered UI feedback work on stock MPC screens, but it can also unexpectedly trigger a note-on-listening plugin parameter if you've mapped a knob to something on a synth that reacts to incoming notes. Turning Touch Sense off stops any Note On messages and leaves the control sending CC only when it's actually turned. Low Range and High Range are the scaling fields worth using on plugin parameters that shouldn't sweep the full 0-127 span, a filter cutoff you only ever want to move within a narrow, musical window benefits from tightening the range instead of relying on careful, slow hand movement across the whole knob travel.
Pedal CC assignment on MPC Key hardware
Pedal Settings live inside the Keyboard Control screen, which edits functions of the keybed itself and is specific to MPC Key hardware, MPC Key 61, MPC Key 37, and (in the newer of the two manual versions checked here) MPC Key 37 G2. Inside that screen, the Pedal field determines which physical pedal input port a setting applies to, selectable from Sustain, FS2, or Expression, and CC Assign is the field that actually sets what MIDI CC number that pedal sends: Disable, Default (which varies depending on the port used), or any CC number 000 through 126. Type (Switch versus Variable) and Polarity (Auto, Positive, or Negative) round out the same section, Type telling the MPC whether to expect an on/off footswitch or a continuous expression-style pedal, and Polarity existing specifically to correct pedals that read backward from what the port expects. This is worth flagging as a genuine hardware-lineup difference, not an editing slip on our part: cross-checking the identical Pedal Settings passage in the older manual version shows it lists only two hardware ports, MPC Key 61 and MPC Key 37, with no MPC Key 37 G2 mentioned anywhere in that sentence. That's not a typo or an OCR artifact on either file, it's the two manual versions correctly reflecting what existed in Akai's own hardware lineup at the time each was published. MPC Key 37 G2 didn't exist yet when the older manual version shipped, so its own manual has nothing to add it to, and every other word in that sentence, the field name, the port list format, the Sustain/FS2/Expression options, is otherwise identical between versions. See the sources section below for how we independently confirmed this rather than taking it on faith.
Touch Strip Mod Wheel and Expression modes
Two of the Touch Strip's several selectable modes exist specifically to reproduce standard MIDI CC behavior other keyboards handle with dedicated hardware. Mod Wheel mode uses the Touch Strip exactly as you'd use a physical mod wheel on a typical keyboard, sending the MIDI CC1 modulation control. Expression mode does the same job an external expression pedal would do, sending MIDI CC11 expression. Neither mode has any user-editable CC Number field of its own, unlike the general-purpose Q-Link Knobs MIDI mapping screen covered above, they're fixed to CC1 and CC11 respectively because those are the two message types Mod Wheel and Expression are named for. If you specifically want the Touch Strip sending a different CC number, the Q-Link Knobs MIDI mapping screen (Control set to Touch Strip) is the field set that lets you pick one, since Mode there is unavailable for Touch Strip but CC Number, MIDI Channel, and range fields all still apply. The Touch Strip also has separate Notes, Note Strum, Pitch Bend, Sustain, and Crossfader modes for other jobs entirely, note performance, chord strumming, pitch bending, sustain on/off, and a virtual crossfader mappable through Q-Link Edit, none of which are CC-mapping modes in the sense this article covers, but worth knowing they exist on the same button before assuming Mod Wheel and Expression are the strip's only two jobs.
Common mistakes and quick fixes
Mistake: recording a Q-Link move and getting nothing back. Automation state has to be set to Write before you press Play, and if what you're recording is specifically MIDI CC automation, SEQ REC ARM has to be enabled and OVERDUB armed before playing starts, not after.
Mistake: recorded automation not playing back. Automation state has to be set back to Read after recording. Leaving it on Write means the next pass keeps overwriting instead of reading back what you already captured.
Mistake: a mapped knob snapping a plugin parameter the instant you touch it. That's Absolute mode doing exactly what it's supposed to, the knob's physical position becomes the value on contact. Switch that control to Relative mode if you're reusing the same physical knob across parameters that don't share the same current value.
Mistake: incoming CC from a controller or DAW fighting with automation you already drew. Check the Track MIDI Perform Settings window for that track and uncheck the specific CC message in the MIDI CC Filter list instead of trying to solve it upstream.
Mistake: expecting Mod Wheel or Expression Touch Strip mode to send a custom CC number. Those two modes are fixed to CC1 and CC11 by definition. Use the Q-Link Knobs MIDI mapping screen with Control set to Touch Strip if you need a different CC number out of the same physical strip.
A note on sources and manual versions
Every technical claim above is checked directly against Akai's Standalone OS User Guide, primarily Manual Version 3.9: the automation recording steps on page 79, the event-type icon reference on page 187, the Track MIDI Perform Settings MIDI CC Filter field on page 268, the Q-Link Knobs MIDI mapping fields on page 336, the Keyboard Control and Pedal Settings sections on pages 102 and 103, and the Touch Strip mode reference on page 106. We cross-checked every one of those against Manual Version 3.7, and the page-number drift between the two versions is genuinely non-uniform, not a single flat offset you can just subtract. The automation recording section sits at v3.9 page 79 versus v3.7 page 74, a five-page gap. The Pedal Settings and Touch Strip sections show the same five-page gap, v3.9 page 103 versus v3.7 page 98, and v3.9 page 106 versus v3.7 page 101. The event-type icon reference sits at v3.9 page 187 versus v3.7 page 181, a six-page gap, one page wider than the sections just above it, meaning the extra content Akai added between versions isn't evenly distributed even within the first hundred-some pages. By the time you reach the MIDI CC Filter and Q-Link mapping sections, the gap has widened again to ten full pages, v3.9 page 268 versus v3.7 page 258, and v3.9 page 336 versus v3.7 page 326. Five pages, then six, then ten: three different offsets across one manual, all confirmed by pulling the actual page content in both files rather than trusting a table of contents, and all word-for-word identical between versions at each pair of pages we checked. If you're ever cross-referencing an older forum post or printout's page number against a newer manual download, don't assume a single constant offset will get you there.
Separately, and this is a real hardware finding rather than a version-numbering quirk: the Pedal field in Keyboard Control lists a third MPC Key model, MPC Key 37 G2, in Manual Version 3.9 that simply isn't present in Manual Version 3.7's otherwise identical sentence. We pulled both passages directly rather than trusting either version's summary, v3.9 page 103 reads "MPC Key 61/Key 37/Key 37 G2" and v3.7 page 98 reads "MPC Key 61/MPC Key 37," with every other word in the sentence unchanged between versions. That tracks with the hardware timeline, not a documentation error: MPC Key 37 G2 is newer hardware that didn't exist when the older manual version was published, so there was nothing yet to list.
Verdict: where to start
VERDICT
New to CC automation entirely: arm SEQ REC ARM, press OVERDUB, and record one pass over a single Q-Link knob mapped to a mixer or plugin parameter. Set automation back to Read and listen. That one loop is the entire recording workflow. Fighting incoming CC that fights your own automation: the per-track MIDI CC Filter is the fix, uncheck the specific message type in that track's MIDI Filter window instead of hunting through the controller or DAW that's sending it. Mapping a controller or plugin to a specific CC number: the Q-Link Knobs MIDI mapping screen is the whole toolkit, CC Number for the message, Mode for Absolute versus Relative behavior, Low/High Range to keep a sweep musical instead of full-travel, Touch Sense off if a Note On message is triggering something you don't want triggered. Using a pedal: that's Keyboard Control on MPC Key hardware specifically, CC Assign is the field, and Default varies by which of the three ports, Sustain, FS2, or Expression, you've plugged into. Want the Touch Strip sending a fixed, standard message with zero setup: Mod Wheel and Expression modes already do that, CC1 and CC11 respectively, no mapping screen required.
Found a CC mapping trick worth sharing? Tell us what happened.